Ensure accessibility and compliance with these essential tips for properly installing ADA Braille room signage.
Installing ADA Braille room signage correctly is crucial for ensuring accessibility and compliance with the Americans with Disabilities Act (ADA). Proper installation not only meets legal requirements, but also ensures that everyone, including those with visual impairments, can navigate spaces independently. If your sign shop has questions on how to properly install room signage, let us help you with the essential aspects of ADA Braille room signage installation, including location, mounting heights, and additional considerations.
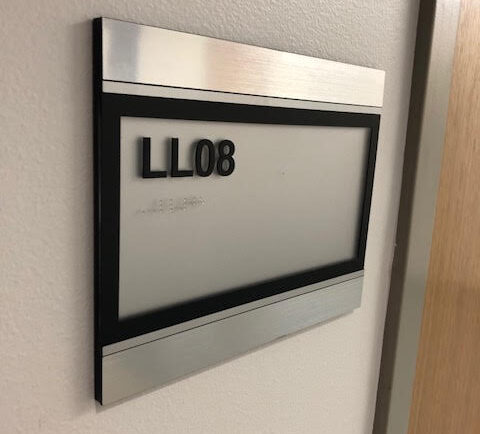
1. Understanding ADA Requirements
The ADA sets specific standards for Braille signage placement to ensure accessibility for all. These guidelines are designed to make signs easy to locate and read by individuals with visual impairments. Here are the key requirements:
- Sign Location: ADA Braille signs should be installed adjacent to the latch side of the door. For doors that do not have a latch side, such as double doors or sliding doors, the sign should be placed on the nearest adjacent wall. This ensures that the sign is easily found by someone searching for it.
- Mounting Height: The ADA requires that the tactile characters on Braille signs be located between 48 and 60 inches above the finished floor. This height range ensures that the signs are accessible to a wide range of people, including those who use wheelchairs.
- Distance from the Door: The sign should be mounted so that it is within an 18-inch reach from the door handle. This distance ensures that someone can locate the sign while reaching for the door handle.
2. Installation Guidelines
Now that we’ve covered the general ADA requirements, let’s dive into the specific steps for installing ADA Braille room signage.
- Step 1: Measure the Mounting Height Begin by measuring 48 inches from the finished floor. Mark this point on the wall as the bottom line for the tactile characters. Then, measure up to 60 inches and mark this point as the top line for the tactile characters. The Braille dots should fall within this range.
- Step 2: Determine the Sign Location Identify the latch side of the door. If the door swings out, the sign should be installed on the wall nearest to the door handle. Measure the distance to ensure it is within 18 inches of the handle. For doors without a latch side, place the sign on the nearest adjacent wall, following the same height guidelines.
- Step 3: Secure the Sign After marking the location, use a level to ensure the sign is straight. Apply the appropriate adhesive or mounting hardware according to the wall surface and the sign material. For permanent adhesive, press the sign firmly against the wall and hold it in place to secure the bond. If using screws or anchors, ensure they are flush with the sign surface to maintain the sign’s clean appearance.
- Step 4: Verify the Installation After installation, double-check that the sign meets all ADA requirements for location and height. It’s also a good idea to test the sign’s placement with individuals of varying heights and mobility levels to ensure it is accessible to everyone.
3. Additional Considerations
- Contrast and Readability: Ensure that the sign’s background and characters have a high contrast to make them easier to read. The ADA recommends a 70% contrast between the background and the raised characters for optimal readability.
- Non-Glare Finish: ADA signs must have a non-glare finish to prevent light reflections from impairing readability, particularly for individuals with low vision.
- Durability: Choose durable materials that can withstand wear and tear, especially in high-traffic areas. Photopolymer and acrylic are popular choices for ADA signs due to their longevity and resistance to damage.
4. Final Thoughts
Proper installation of ADA Braille room signage is not only a matter of compliance but also of ensuring accessibility for all individuals. By following these guidelines, you can help create an inclusive environment where everyone can navigate with confidence. If you have any questions about ADA Braille signage or need assistance with installation, feel free to reach out to us. We’re here to help ensure your signs meet all necessary standards and provide the best experience for all users.